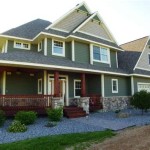
How Much Paint To A Harley: A Comprehensive Guide
Repainting a motorcycle, especially an iconic brand like Harley-Davidson, is a significant undertaking. Achieving a professional finish requires careful planning, the right materials, and a clear understanding of the quantities involved. One of the most crucial aspects is determining the amount of paint needed. Underestimating this quantity can lead to color matching problems and delays, while overestimating results in unnecessary expense. This article will provide a comprehensive guide to estimating the amount of paint required for a Harley-Davidson motorcycle, considering various factors that influence paint consumption. This guide does not factor in any kind of customization or any kind of special paint.
Several elements influence the amount of paint required for a Harley. These include the size and complexity of the motorcycle's bodywork, the number of coats applied, the type of paint used, the application method, and the skill of the painter. A larger motorcycle with extensive body panels will naturally require more paint than a smaller, simpler model. Similarly, intricate paint schemes with multiple colors or graphics will increase paint consumption. Understanding these factors is paramount to accurately estimating the necessary paint quantity.
Key Point 1: Assessing the Surface Area
The first step in determining the required paint volume is accurately assessing the surface area to be painted. This involves considering all components to be painted, including the fuel tank, fenders (front and rear), side covers, and any other panels. For smaller Harleys, like Sportsters, the surface area will be less than larger models, such as Touring bikes or Road Kings. It is beneficial to consult the motorcycle's service manual or manufacturer specifications, which may provide dimensions of the major body panels.
If precise dimensions are unavailable, a reasonable approximation can be obtained by measuring the length and width of each panel and calculating the area. Irregularly shaped panels can be divided into simpler geometric shapes (rectangles, triangles) to estimate the area. Once the area of each component is calculated, sum them to determine the total surface area. Remember to account for both sides of each panel if they are to be painted. This calculation provides a baseline for estimating the paint volume, but it's crucial to understand it's a minimum requirement impacted by other factors.
Understanding the existing finish is relevant to calculating the amount of paint needed. If the existing finish is smooth and in good condition, fewer coats of primer and color might be needed. However, if the existing finish is damaged, peeling, or uneven, more preparation and potentially more primer and paint may be required to achieve a smooth, uniform surface. Sanding and filling imperfections will reduce the amount of paint absorbed by the surface, leading to more efficient paint usage.
Key Point 2: Understanding Paint Types and Coats
Different types of paint have varying coverage rates, expressed as square feet per gallon (or equivalent metric unit). Single-stage paints, which combine the color and clear coat in a single application, generally require less material than two-stage or three-stage systems. Two-stage systems involve applying a base coat for color followed by a clear coat for protection and gloss. Three-stage systems, such as candy paints or pearlescent finishes, involve a base coat, a mid-coat (for the desired effect), and a clear coat. Each stage adds to the total paint volume needed.
The number of coats applied significantly impacts the total paint consumption. Most paint manufacturers recommend applying two to three coats of color for optimal coverage and color saturation. Each coat adds to the total thickness of the paint film, contributing to durability and visual appeal. For custom finishes or specific colors, more coats may be necessary to achieve the desired effect. The number of clear coats also needs consideration. Typically, two to three coats of clear coat are applied to provide adequate protection against scratches, UV damage, and environmental factors.
Primer is another crucial component. The purpose of primer is to create a smooth, uniform surface for the color coat to adhere to. It also helps to seal the surface and prevent the underlying substrate from affecting the color. Generally, one to two coats of primer are sufficient, depending on the condition of the surface and the type of primer used. Epoxy primers offer excellent adhesion and corrosion resistance. The primer color is also critical; a gray primer is usually acceptable for most colors, white or black for light and dark colors, respectively. The primer color can influence the final color if too few coats of paint are applied.
For single-stage paints, a quart (946 ml) is often sufficient for a smaller Harley like a Sportster, while a gallon (3.785 L) might be necessary for larger models. For two-stage systems, a quart of base coat and a quart of clear coat may suffice for a Sportster, while larger models may require a quart and a half or even a gallon of each. With three-stage systems, these amounts can increase significantly, demanding careful planning and larger paint orders. It is always advisable to have extra paint on hand for touch-ups or unforeseen circumstances.
Key Point 3: Application Methods and Waste
The method of paint application has a direct impact on paint consumption and waste. Spray guns are the most common method for achieving a professional finish on motorcycles. However, spray guns can be inefficient, with a significant portion of the paint being lost as overspray. High-Volume Low-Pressure (HVLP) spray guns are generally considered more efficient than traditional air spray guns, as they transfer a higher percentage of the paint to the surface. However even with an HVLP gun, a certain amount of paint is still wasted.
The spray gun setup is also crucial. The nozzle size, air pressure, and spray pattern should be adjusted appropriately for the type of paint being used and the size and shape of the surface being painted. Incorrect settings can lead to excessive overspray, runs, or an uneven finish, increasing paint consumption. It's crucial to practice to understand how much paint gets applied depending on the spray guns adjustments. It is advisable to start with a low air pressure and then slowly increase it until the paint flows evenly.
The skill and experience of the painter also significantly influence paint consumption. Experienced painters are more efficient at applying paint, minimizing overspray and achieving uniform coverage with fewer coats. Amateur painters may tend to apply thicker coats or experience more runs, resulting in higher paint consumption. Practice on a scrap panel is invaluable, not only for mastering the technique but also for understanding the coverage rate of the specific paint being used. It is also important to ensure that the spray gun is properly cleaned after each use and that the paint is properly mixed. Using strainers when pouring paint into the spray gun can also prevent contaminants from entering and affecting the finish.
Accounting for waste is crucial when estimating paint quantities. A general rule of thumb is to add an additional 10-20% to the estimated paint volume to account for overspray, spills, and the residual paint left in the spray gun and mixing containers. For complex paint schemes or inexperienced painters, a higher allowance for waste is advisable. It's always better to have slightly more paint than needed than to run out mid-project.
To further minimize waste, consider using a paint cup liner. Paint cup liners make it easier to clean the spray gun. By using such liners, less thinner is used to clean the cup. This is helpful for the environment and economical.
In summary, determining the amount of paint to repaint a Harley-Davidson requires careful consideration of the surface area, the type of paint and number of coats, and the application method. By accurately assessing these factors, you can make a more informed estimate of the necessary paint volume and avoid costly surprises during the painting process. Always consult the paint manufacturer's recommendations for coverage rates and mixing instructions, and don't hesitate to seek advice from experienced painters or automotive paint suppliers.

How Much Paint To Your Motorcycle

How Much Aerosol Paint Do I Need Motorcycle And Helmet Scratcheshappen

How Much Aerosol Paint Do I Need Motorcycle And Helmet Scratcheshappen

How Much Paint To Your Motorcycle

How Much Would It Cost To Paint A Street Glide Harley Davidson Forums

How Much Would It Cost To Paint A Street Glide Harley Davidson Forums

Guess How Much This Road Glide Special S Paint Costs Hot Bike

How Much Does A Motorcycle Paint Job Cost

How Much Does It Cost To Customise A Bike Dirty Unicorn

How To Paint A Motorcycle Engine
Related Posts