How to Read Paint Color Codes in Revit
Revit, a Building Information Modeling (BIM) software, allows users to create detailed 3D models of buildings. One crucial aspect of these models is the representation of material finishes, including paint colors. Accurately defining and interpreting paint color codes within Revit is essential for ensuring consistent and accurate visual representation, documentation, and ultimately, realization of the design intent. This article will delve into the methods used to read paint color codes in Revit, covering various aspects from basic material definitions to advanced techniques for managing color information.
Understanding how Revit handles paint color codes requires familiarity with the program's material library and its properties. Revit does not inherently interpret specific industry-standard color codes directly. Instead, it relies on RGB (Red, Green, Blue) values to define color. Consequently, reading paint color codes in Revit involves converting the code to its equivalent RGB representation and then applying that value to the appropriate material within the Revit project.
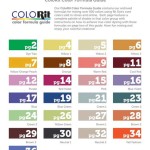
The process begins with understanding the type of paint color code being used. Common color coding systems include: Pantone, RAL, NCS, and specific paint manufacturer codes (e.g., Benjamin Moore, Sherwin-Williams). Each system utilizes a unique notation for specifying colors. These codes, however, are rarely directly supported within Revit's material definition.
Therefore, the primary task is to translate the given paint color code into an RGB value. Several online tools and resources are available for this purpose. Paint manufacturers often provide their own converters or cross-reference charts that map their specific color codes to RGB values. These tools are crucial for accurately translating the design intent into the Revit model.
Once the RGB value is obtained, it must be applied to the material definition within Revit. This involves accessing the Material Browser, creating or modifying a material, and adjusting the Appearance asset's color properties. The process is outlined in more detail below.
Creating and Modifying Materials in Revit
To effectively manage paint color codes, users must be proficient in creating and modifying materials within Revit. The Material Browser is the central interface for this task. It can be accessed via the "Manage" tab, then clicking "Materials." This opens a dialogue box displaying all materials currently available in the project.
To create a new material, click the small sphere icon located at the bottom left of the Material Browser labeled "Create New Material." A new material with a default name and properties will be created. This new material can then be renamed to reflect the specific paint color being represented (e.g., "Benjamin Moore – Revere Pewter").
To modify an existing material, simply select it from the list in the Material Browser. The properties of the selected material are displayed in the right pane of the dialogue box. These properties are divided into several tabs, including "Identity," "Graphics," and "Appearance." The "Appearance" tab is most relevant for defining the paint color.
The "Appearance" tab controls the visual representation of the material in rendered views. It utilizes an "Appearance Asset," which defines the material's surface properties, including color, reflectivity, transparency, and texture. The Appearance Asset can be accessed by clicking on the asset name displayed within the "Appearance" tab.
Within the Appearance Asset, the "Generic" properties contain the "Color" setting. Clicking on the color swatch opens the Color Picker dialogue box. This dialogue box allows users to define the color using RGB values, HSL (Hue, Saturation, Luminance) values, or through a color wheel.
To accurately apply the paint color code, enter the corresponding RGB values obtained from the color code conversion tool. For example, if the RGB value for a particular paint color is R: 200, G: 150, B: 100, these values should be entered into the respective fields in the Color Picker. Once the RGB values are entered and "OK" is clicked, the color swatch will update to reflect the chosen color, and the material will be visually updated in the model to reflect this change.
It is important to note that Revit's rendering engine may interpret colors slightly differently depending on the rendering settings and hardware capabilities. Therefore, it is always recommended to perform test renderings to verify that the colors are accurately represented.
Using Color Swatches and Libraries
To streamline the process of assigning paint colors, and ensure consistency across projects, Revit users can leverage color swatches and material libraries. Color swatches allow users to quickly sample colors from existing elements or images within the Revit environment. Material libraries enable the storage and reuse of predefined materials, including those with specific paint color definitions. This ensures consistency across multiple projects and reduces the need to repeatedly define the same materials.
To use color swatches, the "Paint" tool (Modify tab -> Geometry panel -> Paint) can be used. If the desired paint color is already applied to an element in the model, the "Match Properties" tool (Modify tab -> Clipboard panel -> Match Properties) can copy the material from that element to another. This is essentially a color swatch function within Revit, allowing users to quickly replicate colors across surfaces.
Creating a material library is a more involved process, but provides significant long-term benefits. A material library is essentially a Revit project file that contains a collection of predefined materials. This project file can be stored in a central location accessible to all users on a project team, ensuring consistent material usage across the organization.
To create a material library, start a new Revit project. Then, create and define all the necessary materials, each representing a different paint color or finish. Save the project file in a designated library folder. When working on a new project, users can load materials from this library by opening the Material Browser and clicking the small arrow at bottom left of the dialog box, selecting "Open Existing Library". Users can then select the materials they want to import into their current project.
Regularly updating and maintaining the material library is paramount to ensure accuracy and relevance. New paint colors are constantly being released, and existing ones may be discontinued. Therefore, the material library should be reviewed and updated periodically to reflect the current paint color landscape.
Furthermore, consider adding parameters to the material definitions to store additional information, such as the paint manufacturer, specific color code, sheen level, and other relevant details. These parameters can be used for scheduling and documentation purposes, providing a comprehensive record of the materials used in the project.
Addressing Limitations and Best Practices
While Revit provides tools for managing paint colors, it is important to acknowledge its limitations. As mentioned earlier, Revit primarily uses RGB values to define colors, and does not directly interpret industry-standard color codes. This requires users to manually convert color codes to RGB values, which can be a time-consuming and error-prone process.
Another limitation is the visual representation of colors in Revit. The software's rendering engine may not perfectly replicate the appearance of real-world paint colors. Factors such as lighting conditions, material properties, and rendering settings can affect the final visual outcome. Therefore, it is essential to perform test renderings and adjust material properties as needed to achieve the desired visual effect.
To mitigate these limitations, several best practices should be followed. Firstly, always use reliable color code conversion tools and resources. Paint manufacturers' websites and technical documentation are often the most accurate sources of information. Secondly, document the RGB values used for each paint color in the material definition. This will facilitate future reference and ensure consistency if the material needs to be recreated or modified. Thirdly, use descriptive names for materials to clearly identify the paint color and manufacturer. This will make it easier for other users to understand and use the materials correctly.
Furthermore, it is recommended to establish a standardized workflow for managing paint colors. This workflow should include steps for: (1) identifying the required paint colors based on the design specifications; (2) converting the color codes to RGB values; (3) creating or modifying materials in Revit; (4) applying the materials to the appropriate elements in the model; and (5) verifying the visual representation of the colors through test renderings.
Adhering to these best practices will improve the accuracy and efficiency of managing paint color codes in Revit, leading to a more reliable and visually appealing building model. This facilitates better communication between designers, contractors, and clients, and ultimately contributes to a more successful project outcome.
Finally, consider using Revit add-ins or plugins that are specifically designed for managing materials and color palettes. These tools can automate the process of converting color codes to RGB values, provide advanced color management features, and integrate directly with paint manufacturers' databases. While these add-ins may require an additional investment, they can significantly improve productivity and accuracy, especially on large and complex projects.

Paint Colors In Revit Autodesk Community

Revit Basic Colours Autodesk Community

Create Revit Colour Scheme

Valspar S Autodesk Revit Bim Library For Architectural Coatings Lets Projects Come To Life Building Design Construction

Revit Selecting And Changing Colors Of Elements

Why Is It So Difficult To Get Colors Show Up Page 2 Buildingsmart Forums

Revit Add Ons Ultimate Plugin Suite 2024 Updated

New In Revit 2024 Color Book Browser

Revit Color Scheme Microsol Resources

Color Fill Legend For Plan Section Rooms Area Schedule In Revit Tutorial Project Delivery
Related Posts