Can You Paint A Wooden Kitchen Worktop? A Comprehensive Guide
Wooden kitchen worktops, cherished for their natural beauty and warmth, are a popular choice in many homes. However, their vulnerability to water damage, stains, and wear and tear often leads homeowners to consider alternative finishes. Painting a wooden worktop is a viable option, offering a cost-effective way to refresh its appearance and provide a degree of protection. This article provides a detailed guide on how to paint a wooden kitchen worktop, covering the necessary preparations, appropriate materials, and application techniques, along with considerations for durability and maintenance.
Before embarking on a painting project, it is crucial to understand the inherent properties of wood and how paint interacts with it. Wood is a porous material, meaning it absorbs liquids and is susceptible to expansion and contraction with changes in humidity. These factors influence the choice of paint and the application process. Furthermore, the existing condition of the worktop, including any previous finishes or damage, will dictate the level of preparation required.
The success of painting a wooden worktop hinges on meticulous preparation. This involves thorough cleaning, sanding, and priming. Each step plays a critical role in creating a smooth, durable, and long-lasting finish that can withstand the rigors of a kitchen environment.
Key Point 1: Essential Preparation Steps
The first step in preparing a wooden worktop for painting is thorough cleaning. Remove all loose debris, grease, and grime. Use a degreasing cleaner specifically designed for wood and follow the manufacturer's instructions carefully. Rinse thoroughly with clean water and allow the worktop to dry completely before proceeding.
Following cleaning, a thorough sanding is imperative. Sanding removes any existing finish, smooths the surface, and creates a "key" for the paint to adhere to. Start with a coarser grit sandpaper (e.g., 80-grit) to remove old varnish or paint, then gradually move to finer grits (e.g., 120-grit, then 220-grit) for a smooth finish. For heavily varnished surfaces, consider using a paint stripper before sanding to ease the process. Always sand in the direction of the wood grain to avoid unsightly scratches.
Pay particular attention to edges and corners, as these areas are prone to chipping and wear. Use a sanding block or sponge to ensure even pressure and avoid rounding sharp edges unnecessarily. After sanding, meticulously remove all sanding dust with a vacuum cleaner and a tack cloth. Dust particles trapped beneath the paint will compromise the finish.
Priming is a critical step that is often overlooked, but it is essential for achieving a professional and durable finish. The primer seals the wood, prevents tannins from bleeding through the paint, and provides a uniform surface for the topcoat to adhere to. Select a high-quality primer specifically designed for wood. Apply the primer in thin, even coats, following the manufacturer's instructions. Allow the primer to dry completely before lightly sanding it with a fine-grit sandpaper (e.g., 220-grit) to create a smooth surface for the paint. Remove all sanding dust before proceeding.
Filling any imperfections, such as cracks or dents, should be done before priming. Use a wood filler that is suitable for painting. Apply the filler according to the manufacturer's instructions and allow it to dry completely. Sand the filled areas smooth and level with the surrounding surface before priming.
Proper preparation is significantly more time-consuming than the actual painting. However, it is an investment that will pay off in the long run by ensuring a durable and aesthetically pleasing finish.
Key Point 2: Selecting the Right Paint and Tools
Choosing the right paint is critical for achieving a durable and aesthetically pleasing finish on a wooden kitchen worktop. Due to the demanding environment, the paint must be resistant to water, stains, heat, and abrasion. Several options are available, each with its own advantages and disadvantages.
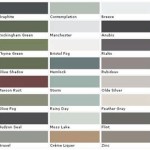
Acrylic latex paints are a popular choice for kitchen surfaces due to their durability, ease of application, and low VOC (volatile organic compounds) content. They are water-based, making them easy to clean up, and they offer good resistance to water and stains. Choose a high-quality acrylic latex paint specifically formulated for interior use and preferably one that mentions durability or resistance to abrasion. Consider a paint with a satin or semi-gloss finish, as these are easier to clean than matte finishes.
Oil-based paints offer excellent durability and a hard, protective finish. They are more resistant to water and chemicals than acrylic latex paints. However, oil-based paints have a higher VOC content, release stronger odors, and require mineral spirits for cleanup. They also tend to yellow over time, especially in areas with limited sunlight. While their durability may be appealing, the downsides make them less favored for modern kitchens.
Specialty paints, such as epoxy paints or polyurethane coatings, offer superior durability and resistance to chemicals and abrasion. These paints are often used in industrial settings and can provide a very tough finish for kitchen worktops. However, they are more difficult to apply and may require professional application. They also have a higher VOC content and require specialized cleanup procedures.
Once the paint is chosen, the appropriate tools are required for the application. High-quality brushes, rollers, and paint trays are essential for achieving a smooth, even finish. Use synthetic brushes and rollers for acrylic latex paints and natural bristle brushes for oil-based paints. Consider using a small foam roller for applying paint to flat surfaces, as it minimizes brush strokes. A paint tray with a liner will make cleanup easier. Painter's tape is essential for masking off areas that are not to be painted, such as walls, cabinets, and sinks. A drop cloth or plastic sheeting will protect the surrounding area from paint splatters.
Investing in quality tools will make the painting process easier and more efficient, resulting in a more professional-looking finish.
Key Point 3: Application Techniques and Post-Painting Care
Proper application techniques are crucial for achieving a smooth, even, and durable paint finish on a wooden kitchen worktop. Begin by applying painter's tape to mask off any areas that are not to be painted, such as the backsplash, cabinets, and sink. Ensure that the tape is firmly adhered to the surface to prevent paint from seeping underneath.
Apply the paint in thin, even coats, using a brush or roller. Avoid applying too much paint at once, as this can lead to drips, runs, and uneven drying. If using a brush, work in the direction of the wood grain. If using a roller, roll in small, overlapping sections, maintaining a wet edge to prevent lap marks. Allow each coat of paint to dry completely before applying the next coat. Follow the manufacturer's instructions for drying times.
Between coats, lightly sand the surface with a fine-grit sandpaper (e.g., 320-grit) to remove any imperfections and create a smooth surface for the next coat. Remove all sanding dust with a vacuum cleaner and a tack cloth before proceeding.
Apply at least two coats of paint for optimal coverage and durability. More coats may be necessary if the paint is a light color or if the worktop has a dark stain. Allow the final coat of paint to dry completely before removing the painter's tape. Pull the tape away from the painted surface at a 45-degree angle to prevent chipping the paint.
To enhance the durability and water resistance of the painted worktop, consider applying a clear topcoat. Polyurethane is a durable and water-resistant option. Apply the topcoat in thin, even coats, following the manufacturer's instructions. Allow the topcoat to dry completely before using the worktop.
Post-painting care is essential for maintaining the appearance and durability of the painted worktop. Clean the worktop regularly with a damp cloth and mild detergent. Avoid using abrasive cleaners or scouring pads, as these can scratch the paint. Wipe up spills immediately to prevent staining. Use cutting boards and trivets to protect the paint from scratches and heat damage. Avoid placing hot pots and pans directly on the painted surface.
With proper care and maintenance, a painted wooden kitchen worktop can provide years of beauty and functionality. Regular touch-ups may be necessary to repair any chips or scratches. Spot-sand the damaged area, prime it, and repaint it with the original paint.
In summary, painting a wooden kitchen worktop is a feasible project that can revitalize a kitchen's aesthetic. The key to success lies in preparing the surface meticulously, selecting appropriate paints and tools, and applying the paint with skill and patience. Regular maintenance will prolong the life of the painted finish and ensure it remains an attractive and functional part of the kitchen.

The Key Reasons Why You Shouldn T Paint Your Kitchen Worktops

How To Update A Kitchen With Painted Worktops Pillar Box Blue

Can You Paint Over An Old Kitchen Worktop Here S What Need To Know Mr Sander

How To Renew Your Wooden Kitchen Worktop

Can You Paint Over An Old Kitchen Worktop Here S What Need To Know Mr Sander

The Key Reasons Why You Shouldn T Paint Your Kitchen Worktops

How To Update A Kitchen With Painted Worktops Pillar Box Blue

Can You Paint A Laminate Kitchen Worktop In Detailed Guide

Kitchen Worktop Repair Wooden Restoration The Carpenter S Daughter

Restoring A Wooden Kitchen Worktop The Carpenter S Daughter
Related Posts