How To Use Touch Up Paint For a Car: A Comprehensive Guide
Maintaining a vehicle's pristine appearance often involves addressing minor imperfections in the paintwork. Scratches, chips, and blemishes, while seemingly insignificant, can detract from the overall aesthetic and potentially lead to rust if left unattended. Touch-up paint provides a cost-effective and relatively simple solution for rectifying these minor flaws, restoring the vehicle's finish and preventing further damage. This article provides a detailed guide on how to effectively use touch-up paint on a car, outlining the necessary materials, preparation steps, application techniques, and finishing touches to achieve a professional-looking result.
Preparing the Surface for Touch Up Paint
Proper preparation is paramount for a successful touch-up paint application. This stage involves cleaning the affected area, removing any loose debris, and ensuring a smooth and even surface for the paint to adhere to. Failure to adequately prepare the surface can result in poor adhesion, an uneven finish, and ultimately, an unsatisfactory outcome.
The first step involves thoroughly washing the vehicle, paying particular attention to the area requiring touch-up. Use a high-quality car wash soap and a soft sponge or microfiber cloth to remove dirt, grime, and any other contaminants. Rinse the area thoroughly with clean water and allow it to dry completely. Once dry, inspect the damage closely to assess its severity and identify any loose paint or rust.
If loose paint or rust is present, it must be carefully removed. Use a fine-grit sandpaper (e.g., 400-grit or 600-grit) to gently sand the affected area, feathering the edges of the damage to create a smooth transition between the existing paint and the exposed surface. Apply light pressure and avoid sanding beyond the immediate area of the damage. The goal is to remove any loose material and create a smooth, even surface for the touch-up paint to adhere to. After sanding, wipe the area clean with a tack cloth or a lint-free cloth dampened with isopropyl alcohol to remove any sanding dust and ensure a clean surface.
For deeper scratches or chips that expose bare metal, it may be necessary to apply a rust inhibitor or primer before applying the touch-up paint. Rust inhibitors help to prevent further corrosion of the exposed metal, while primers provide a smooth and even surface for the touch-up paint to adhere to. Apply the rust inhibitor and primer according to the manufacturer's instructions, allowing sufficient drying time before proceeding to the next step.
Another important step in surface preparation is masking. Use painter's tape to carefully mask off the area surrounding the damage, protecting the surrounding paintwork from accidental overspray or spills. This step is particularly important when dealing with larger areas of damage or when using spray-based touch-up paint. Overlap the tape slightly onto the existing paint to ensure a crisp and clean line.
Applying Touch-Up Paint Effectively
The application of touch-up paint requires a steady hand and a meticulous approach. Several methods can be used, depending on the type of touch-up paint and the size and shape of the damage. The most common methods include using a fine-tipped brush, a paint pen, or an aerosol spray can. Each method has its own advantages and disadvantages, and the choice of method will depend on the specific situation.
Before applying the touch-up paint, it is essential to ensure that the paint is properly mixed. Shake the touch-up paint bottle or can vigorously for several minutes to ensure that the pigments are evenly distributed. This is particularly important for metallic or pearlescent paints, as the metallic flakes or pearlescent particles can settle at the bottom of the container. If the pigments are not properly mixed, the resulting color may not match the surrounding paintwork.
When using a fine-tipped brush, apply the touch-up paint in thin, even layers. Avoid applying too much paint at once, as this can result in drips, runs, and an uneven finish. Instead, apply several thin layers, allowing each layer to dry completely before applying the next. This will allow the paint to build up gradually and create a smooth and even surface. Use the tip of the brush to carefully fill in the scratch or chip, avoiding overlapping onto the surrounding paintwork. If necessary, use a clean, lint-free cloth to wipe away any excess paint.
Paint pens offer a convenient and precise method for applying touch-up paint. Press the tip of the pen several times to prime the applicator and allow the paint to flow. Apply the paint in thin, even strokes, following the contours of the scratch or chip. As with the brush method, avoid applying too much paint at once. Allow each layer to dry completely before applying the next. The advantage of using a paint pen is its precision, which allows for accurate application in tight or intricate areas.
Aerosol spray cans are best suited for larger areas of damage or when attempting to blend the touch-up paint into the surrounding paintwork. Before spraying, test the spray pattern on a piece of cardboard to ensure that the spray is even and consistent. Hold the spray can approximately 8-12 inches away from the surface and apply the paint in thin, even coats, overlapping each coat slightly. Avoid spraying too much paint at once, as this can result in runs and an uneven finish. Allow each coat to dry completely before applying the next.
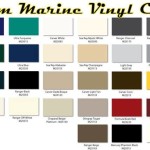
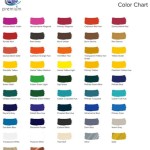
Regardless of the application method, it is crucial to match the color of the touch-up paint to the vehicle's original paint color. The vehicle's paint code can usually be found on a sticker located on the driver's side door jamb, in the glove compartment, or under the hood. Use this paint code to purchase the correct touch-up paint from an auto parts store or online retailer. It is also advisable to test the touch-up paint in an inconspicuous area of the vehicle before applying it to the damaged area to ensure a proper color match.
Finishing Touches and Post-Application Care
Once the touch-up paint has been applied and allowed to dry completely, the final step involves blending the touch-up paint into the surrounding paintwork and protecting the repaired area. This stage is crucial for achieving a seamless and professional-looking result. Failing to properly blend and protect the touch-up paint can result in a noticeable repair and potentially compromise the longevity of the repair.
After the touch-up paint has dried completely (typically at least 24 hours), use a fine-grit sandpaper (e.g., 2000-grit or 3000-grit) to gently sand the edges of the touch-up paint, blending it into the surrounding paintwork. Apply light pressure and use a circular motion to feather the edges of the repair. The goal is to remove any sharp edges or imperfections and create a smooth transition between the touch-up paint and the existing paint.
After sanding, use a rubbing compound or polishing compound to further blend the touch-up paint into the surrounding paintwork. Apply a small amount of compound to a clean, soft cloth and rub the area in a circular motion, applying moderate pressure. The rubbing compound will help to remove any remaining imperfections and create a smooth, glossy finish. Follow the rubbing compound with a polishing compound to further refine the finish and enhance the gloss. Wipe away any residue with a clean, lint-free cloth.
Finally, apply a coat of wax or sealant to protect the repaired area and enhance its shine. Apply the wax or sealant according to the manufacturer's instructions, using a clean, soft cloth. The wax or sealant will help to protect the touch-up paint from the elements and prevent fading, oxidation, and other damage. It will also help to enhance the gloss and appearance of the repaired area.
Regular maintenance and care are essential for preserving the quality of the touch-up paint repair. Wash the vehicle regularly with a mild car wash soap and avoid using harsh chemicals or abrasive cleaners. Protect the vehicle from direct sunlight and extreme temperatures, as these can cause the touch-up paint to fade or crack. Inspect the repaired area periodically for any signs of damage or deterioration and address any issues promptly.
By following these steps carefully and using the appropriate materials and techniques, it is possible to achieve a professional-looking touch-up paint repair that restores the vehicle's finish and prevents further damage. While touch-up paint is not a substitute for professional paint repair, it provides a cost-effective and convenient solution for addressing minor imperfections and maintaining the vehicle's overall appearance. The key to success lies in thorough preparation, careful application, and proper finishing touches.

How To Apply Touch Up Paint A Car With Pen Or Brush

How To Touch Up Your Car S Paint Job Autozone

How To Touch Up Paint On Your Car

Essentials For Touching Up Your Car

How To Buff Deep Scratches And Apply Touch Up Paint

Diy Black Car Touch Up Paint From Rock Hit Featured Episode 33

How To Apply Touch Up Paint A Car With Pen Or Brush

Tips For Using A Mazda Touch Up Paint Pen Realmazdaparts Blog Com

How To Touch Up Car Paint Like A Pro Auto Detail Stl

How To Touch Up Nicks And Scratches In Your Car S Paint
Related Posts