Can You Paint A Kitchen Counter? A Comprehensive Guide
The question of whether a kitchen counter can be painted is a common one, arising from various motivations. Whether it's budget constraints preventing a full replacement, a desire to update aesthetics without extensive renovation, or a simple yearning for a change, painting a kitchen counter offers a potential solution. However, the feasibility and long-term success of this undertaking depend heavily on several factors, including the existing counter material, the preparation process, the type of paint used, and the application technique.
Painting a kitchen counter is not a simple coat-and-go procedure. It requires meticulous planning, precise execution, and an understanding of material properties to achieve a durable and visually appealing result. Unlike painting a wall, a kitchen counter endures significant daily wear and tear, including exposure to moisture, heat, sharp objects, and various cleaning agents. Therefore, the paint and protective coatings must be robust enough to withstand these conditions without chipping, scratching, peeling, or staining.
Before even considering picking up a paintbrush, it's crucial to accurately identify the existing counter material. Common kitchen counter materials include laminate, wood, tile, concrete, and even some solid surface materials. Each material presents unique challenges and requires specific preparation techniques to ensure proper paint adhesion. For instance, laminate is a non-porous surface that requires extensive sanding and a bonding primer, whereas wood may necessitate filling imperfections and sealing to prevent moisture absorption.
The preparation stage is arguably the most critical aspect of painting a kitchen counter. Insufficient preparation will invariably lead to a failed paint job, resulting in wasted time, effort, and materials. This stage typically involves thorough cleaning, sanding, repairing imperfections, and applying a suitable primer. The goal is to create a clean, smooth, and slightly textured surface that will allow the paint to adhere properly and provide a durable base for the subsequent coats.
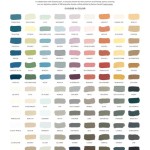
Selecting the right paint is equally important. Not all paints are created equal, and using the wrong type can lead to unsatisfactory results. Generally, epoxy-based paints, specialized countertop paints, or high-quality acrylic latex paints formulated for interior surfaces are recommended. These paints offer superior durability, stain resistance, and adhesion compared to standard wall paints. It's also crucial to choose a paint with a suitable sheen level. Semi-gloss or gloss finishes are generally preferred for kitchen counters as they are easier to clean and offer better resistance to moisture and stains.
The application of the paint should be done with care and precision. Multiple thin coats are generally preferable to a single thick coat, as this minimizes the risk of drips, runs, and uneven coverage. Each coat should be allowed to dry completely before applying the next, following the manufacturer's instructions regarding drying times. The use of high-quality brushes or rollers designed for smooth surfaces is also recommended to achieve a professional-looking finish.
Finally, a protective topcoat is essential to seal the paint and provide an extra layer of durability. Polyurethane or epoxy clear coats are commonly used for this purpose, offering excellent resistance to scratches, stains, and moisture. The topcoat should be applied in multiple thin coats, allowing each coat to dry completely before applying the next. It's crucial to choose a topcoat that is compatible with the paint used and intended for use on kitchen countertops.
Key Point 1: Material Identification and Preparation
The foundation of a successful countertop painting project lies in accurately identifying the existing material and meticulously preparing the surface. Failure to properly identify the material can lead to the selection of inappropriate primers and paints, resulting in poor adhesion and premature failure of the paint job. Similarly, inadequate preparation, such as skipping sanding or using the wrong cleaning products, can compromise the integrity of the painted surface.
When dealing with laminate counters, the glossy surface must be thoroughly sanded to create a rough texture that the primer can grip. A 220-grit sandpaper is generally sufficient for this purpose. After sanding, the surface should be cleaned with a degreasing cleaner to remove any dust or residue. A high-quality bonding primer specifically designed for non-porous surfaces is essential for ensuring proper adhesion. Two coats of primer may be necessary for optimal results.
For wood countertops, the preparation process involves sanding to create a smooth surface, filling any imperfections with wood filler, and sealing the wood to prevent moisture absorption. The type of sealer used will depend on the type of wood and the desired finish. It's important to use a sealer that is compatible with the paint chosen for the project. Applying a primer is also crucial for wood to ensure the paint adheres properly and creates a uniform base.
Tile countertops present a unique challenge due to the grout lines. The grout lines are generally porous and can absorb paint differently than the tile itself. It is often recommended to use a grout stain or sealant to ensure a uniform surface before priming and painting. Adequate cleaning and sanding of the tile surface are also crucial for proper paint adhesion.
Concrete countertops, while durable, can also be porous and require proper sealing before painting. The surface should be thoroughly cleaned and any cracks or imperfections should be filled with a concrete patching compound. A concrete primer is essential to create a uniform surface and promote paint adhesion.
Key Point 2: Selecting the Right Paint and Topcoat
The choice of paint and topcoat is paramount to the durability and longevity of a painted kitchen countertop. Not all paints are created equal, and selecting a product that is not specifically formulated for use on countertops can lead to chipping, peeling, staining, and other undesirable results. Similarly, the topcoat serves as a crucial protective layer, shielding the paint from daily wear and tear.
Epoxy-based paints are often considered the gold standard for painting kitchen countertops due to their exceptional durability, adhesion, and resistance to chemicals and moisture. These paints form a hard, durable finish that can withstand the rigors of daily use. However, epoxy paints can be more challenging to apply than other types of paint, and they may require specialized equipment and techniques. They also tend to have a stronger odor, requiring proper ventilation during application.
Specialized countertop paints are also available, specifically formulated for use on kitchen countertops. These paints typically offer a balance of durability, ease of application, and aesthetic appeal. They are often designed to mimic the look of natural stone or other high-end countertop materials. Following the manufacturer's instructions carefully is essential when using these specialized paints.
High-quality acrylic latex paints formulated for interior surfaces can also be used, but they may not be as durable as epoxy-based or specialized countertop paints. When using acrylic latex paint, selecting a product with a high sheen level (semi-gloss or gloss) is recommended as these finishes are easier to clean and offer better resistance to moisture and stains. It's also crucial to apply multiple coats of paint and a durable topcoat to protect the painted surface.
The selection of the topcoat is equally important. Polyurethane and epoxy clear coats are commonly used for this purpose, offering excellent resistance to scratches, stains, and moisture. Polyurethane clear coats are available in both water-based and oil-based formulations. Water-based polyurethane is generally easier to apply and has lower odor, while oil-based polyurethane offers superior durability and a slightly amber tint. Epoxy clear coats provide exceptional durability and chemical resistance, but they can be more challenging to apply than polyurethane clear coats.
Key Point 3: Application Techniques and Curing Time
Even with the right materials, proper application techniques are essential for achieving a smooth, durable, and professional-looking finish on a painted kitchen counter. The application process involves careful attention to detail, precise execution, and adherence to the manufacturer's instructions regarding drying times and application methods. Rushing the process or neglecting proper techniques can result in imperfections and a compromised final product.
Applying thin, even coats of paint is crucial for minimizing the risk of drips, runs, and uneven coverage. Multiple thin coats are generally preferable to a single thick coat. Each coat should be allowed to dry completely before applying the next, following the manufacturer's instructions regarding drying times. Using high-quality brushes or rollers designed for smooth surfaces is also recommended to achieve a professional-looking finish. For larger surfaces, a paint sprayer can be used to achieve a uniform and smooth finish.
Sanding lightly between coats of paint can help to remove any imperfections and create a smoother surface for the subsequent coat. This is especially important when using paints that have a tendency to dry with a slightly textured finish. Use a fine-grit sandpaper (220-grit or higher) and sand gently to avoid removing too much paint. Be sure to wipe away any sanding dust before applying the next coat.
After applying the final coat of paint and topcoat, it's crucial to allow the painted surface to cure completely before placing items on the counter or using it for food preparation. The curing time varies depending on the type of paint and topcoat used, but it typically ranges from several days to several weeks. Following the manufacturer's instructions regarding curing time is essential for ensuring the paint and topcoat reach their maximum hardness and durability.
During the curing period, avoid placing heavy objects on the counter or exposing it to excessive moisture or heat. Consider covering the counter with a protective layer, such as a drop cloth or plastic sheeting, to prevent scratches or stains. It's also important to avoid using harsh cleaning agents or abrasive scrubbers on the painted surface, as these can damage the finish. Once the curing period is complete, the painted kitchen counter should be relatively durable and resistant to daily wear and tear. However, it's important to treat the surface with care and avoid exposing it to excessive heat, sharp objects, or harsh chemicals.

I Painted My Kitchen Countertops Ugly Duckling House

How To Paint Countertops Super Easy Renovation 65 Diy Budget Friendly Kitchen Update

How To Paint Laminate Countertops

How To Paint Countertops What You Need Know First

How To Paint A Laminate Countertop

How To Paint Countertops What You Need Know First

How I Painted My Kitchen Countertops Andie Mitc

How To Paint Laminate Kitchen Countertops

How My Painted Countertops Look After 3 Years Of Use

Painting My Granite Countertops Fail Lily Ardor
Related Posts